
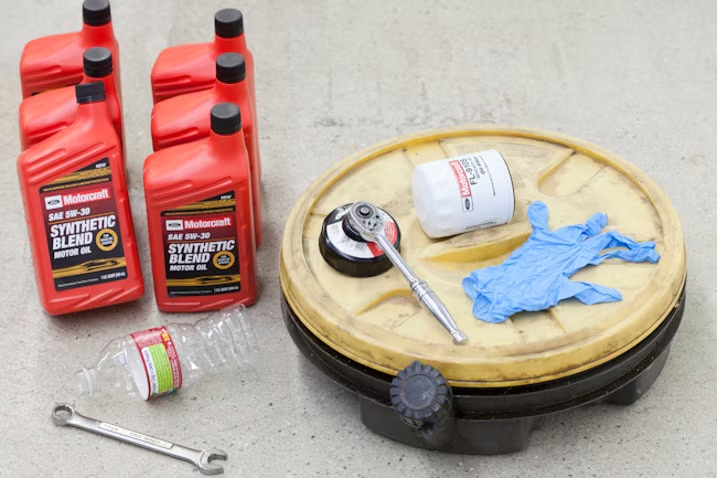
Performing your own oil change can feel empowering once you understand the process. Many drivers wonder how to change oil properly without relying on quick-lube shops every few months. Learning this essential skill not only saves money but also gives you deeper insight into your vehicle’s health. Whether you drive a daily commuter or a weekend adventure vehicle, knowing how to change oil helps extend engine life and maintain peak performance.
In this comprehensive guide, we will walk through everything needed for a successful oil change. From gathering supplies to proper disposal, you will gain practical knowledge that turns a routine task into a confident accomplishment. By the end, you will feel ready to tackle this maintenance staple on your own schedule.
Why Regular Oil Changes Matter for Your Vehicle
Engine oil serves as the lifeblood of your car. It lubricates moving parts, reduces friction, carries away heat, and traps contaminants that could otherwise damage internal components. Over time, oil breaks down from heat, oxidation, and accumulated debris, losing its protective qualities. This degradation makes knowing how to change oil a valuable skill for any car owner.
Modern vehicles with synthetic oils can often go longer between services than older models. Many manufacturers now recommend intervals between 7,500 and 10,000 miles under normal driving conditions, though severe use like frequent short trips, extreme temperatures, or towing may require more frequent attention. Always check your owner’s manual for specific guidance tailored to your make and model.
Skipping or delaying an oil change risks increased engine wear, reduced fuel efficiency, and potentially costly repairs down the road. Regular maintenance through a proper oil change preserves performance and resale value. Drivers who master this process often report greater peace of mind and a stronger connection with their vehicles.
Understanding the Right Oil and Filter for Your Car
Selecting the correct oil represents one of the most important decisions before you begin. Viscosity ratings like 5W-30 or 0W-20 indicate how the oil flows at different temperatures. Using the wrong specification can lead to poor lubrication or increased consumption. Consult your vehicle’s manual or the oil cap for the recommended grade.
Full synthetic oils dominate today’s market because they offer superior protection and longer service intervals compared to conventional options. They resist breakdown better in high-heat environments and flow more easily during cold starts. Semi-synthetic blends provide a middle ground for budget-conscious drivers.
The oil filter plays an equally critical role by capturing particles before they circulate through the engine. Always replace it during every oil change to maintain system cleanliness. Quality filters from reputable brands ensure proper fit and sealing. Many drivers link to our detailed oil filter buying guide for recommendations suited to popular vehicle models.
When purchasing supplies, calculate the exact amount your engine requires, typically four to six quarts for most passenger cars. Buying a bit extra ensures you do not run short during top-off. Reputable sources like manufacturer websites or trusted retailers such as Mobil provide excellent information on oil specifications.
Tools and Materials Needed to Change Oil Safely
Preparation makes the difference between a smooth experience and frustration. You will need basic tools including a socket set with the correct size for your drain plug, an oil filter wrench, a sturdy drain pan, and a funnel. A jack and jack stands or quality ramps provide safe access underneath the vehicle.
Safety equipment deserves priority. Wear gloves to protect your skin from hot oil and contaminants. Safety glasses prevent splashes, while old rags handle inevitable spills. A torque wrench helps reinstall the drain plug to manufacturer specifications, preventing leaks or damage.
Many enthusiasts appreciate having a magnetic drain plug tool or extended funnel for easier access. These small investments make future oil changes even more efficient. For those just starting, our companion article on essential garage tools offers broader recommendations beyond basic maintenance.
Step-by-Step Process to Perform an Oil Change
Begin by parking on a level surface and letting the engine warm up for about five to ten minutes. Warm oil drains more completely but avoid working with extremely hot components. Engage the parking brake and chock the wheels for stability.
Position your drain pan carefully beneath the oil pan. Locate the drain plug, usually toward the rear of the pan. Using the proper socket, loosen it slowly while keeping pressure to control the flow once it comes free. Allow the old oil to drain fully into the pan, which may take several minutes.
While the oil drains, move to the filter. It typically sits on the engine block and requires a specialized wrench for removal. Spin it off by hand after breaking the seal. Wipe the mounting surface clean and prepare the new filter by applying a thin coat of fresh oil to its gasket. This step ensures a proper seal and prevents dry starts.
After the old oil stops dripping, reinstall the drain plug. Tighten it securely but avoid over-torquing, which could strip threads. Install the new filter by hand until snug, then add a final quarter turn. These careful movements during an oil change prevent common mistakes that lead to leaks.
Next, lower the vehicle safely and open the hood. Remove the oil filler cap and insert a funnel. Pour in the new oil gradually, checking the level periodically with the dipstick. Most engines require adding most of the oil first, running the engine briefly, then checking and topping off as needed. This method accounts for residual oil left in the system.
Common Mistakes to Avoid When You Change Oil
Many first-timers rush through certain steps, leading to avoidable issues. One frequent error involves forgetting to replace the drain plug washer if your vehicle uses one. These small gaskets prevent leaks and should be inspected or renewed regularly.
Another pitfall is overtightening components. Excessive force on the filter or plug can cause damage that becomes expensive to repair. Hand-tightening followed by proper torque provides the best results.
Forgetting to check for leaks after completion ranks high among oversights. After adding new oil and running the engine for a minute, shut it off and inspect underneath for drips. This quick verification catches problems while they remain easy to fix.
Temperature also matters. Working with completely cold oil makes draining inefficient, while scalding hot oil increases burn risk. Finding that middle ground through experience improves every subsequent oil change.
Environmental awareness plays a role too. Never pour used oil down drains or discard it improperly. Most auto parts stores and service centers accept used oil for recycling at no charge. Proper disposal protects local waterways and demonstrates responsible vehicle ownership.
Benefits of Learning How to Change Oil Yourself
Taking control of this maintenance task offers multiple advantages beyond financial savings. A professional oil change might cost between $50 and $150 depending on location and oil type. Performing it yourself can cut that expense dramatically while ensuring quality materials go into your engine.
The educational value stands out as well. Regular hands-on work helps you notice unusual noises, fluid conditions, or other developing issues early. This proactive approach often prevents small problems from becoming major repairs.
Many drivers discover a sense of accomplishment after their first successful oil change. It builds confidence for tackling other maintenance like air filter replacement or brake inspections. Our site features several related guides, including how to check tire pressure and basic winter car preparation, to support your growing skills.
Time flexibility represents another significant benefit. You can schedule your oil change when convenient rather than working around shop hours. Weekend warriors particularly appreciate completing maintenance on their own timeline.
Advanced Considerations for Different Vehicle Types
Not all vehicles follow identical procedures. Trucks and SUVs with higher ground clearance may require less lifting, while sports cars or low-profile sedans demand extra caution with ramps. Hybrid and electric vehicles sometimes have different requirements, so always verify specifics.
Performance cars or those used for towing benefit from more frequent attention and possibly higher-grade synthetic oils. Understanding your driving patterns helps customize the interval and oil selection for optimal protection.
Diesel engines often use different filter designs and larger oil capacities. Motorcycle oil changes follow similar principles but involve unique considerations due to shared transmissions in some models. Exploring these variations deepens your overall automotive knowledge.
For those maintaining fleet vehicles or multiple cars, establishing a consistent routine streamlines the process. Keeping records of dates, mileage, and oil types creates a valuable service history that supports warranty claims or future sales.
Environmental and Long-Term Impact of Proper Oil Maintenance
Responsible oil changes contribute to broader environmental goals. Well-maintained engines run cleaner and more efficiently, reducing emissions over time. Recycling used oil prevents soil and water contamination while allowing re-refining into new lubricants.
Modern synthetic formulations last longer partly due to advanced chemistry that minimizes waste. By following manufacturer guidelines and performing thorough oil changes, you participate in more sustainable vehicle ownership practices.
Looking ahead, as engines become more efficient, maintenance intervals may continue extending. However, the fundamental importance of quality oil changes remains constant. Staying informed through trusted resources helps adapt to evolving technology.
Conclusion
Mastering how to change oil transforms routine maintenance into an opportunity for learning and self-reliance. This skill delivers immediate cost savings while building long-term confidence in caring for your vehicle. From selecting the right supplies to executing each step carefully, every element contributes to a smoother-running engine and greater driving enjoyment.
Whether you perform your first oil change this weekend or refine techniques developed over years, the knowledge stays valuable. Regular attention to this vital fluid keeps your car reliable for countless miles ahead. Remember to work safely, dispose of materials responsibly, and celebrate each successful service as another step toward automotive independence.
Take pride in maintaining your vehicle properly. The road ahead becomes more enjoyable when you understand and care for what lies under the hood.
FAQs
How often should I change oil in my car?
Most modern vehicles with synthetic oil need an oil change every 7,500 to 10,000 miles or 12 months, whichever comes first. Check your owner’s manual for exact recommendations based on your driving conditions.
What tools do I need to change oil?
Basic requirements include a socket set, oil filter wrench, drain pan, funnel, jack or ramps, gloves, and rags. A torque wrench helps ensure proper tightening of the drain plug.
Can I change oil without a lift or ramps?
Yes, some vehicles with sufficient ground clearance allow access without lifting. However, ramps or a jack with stands provide safer and easier access for most cars. Always prioritize safety.
Is it worth learning how to change oil myself?
Absolutely. DIY oil changes typically save $50-100 per service while helping you monitor your vehicle’s condition more closely. It becomes faster and easier with practice.
What should I do with the old oil after I change oil?
Collect used oil in a sealed container and take it to an auto parts store or recycling center that accepts it for free. Never pour it down drains or dispose of it with regular trash.