There is something about a beautifully made bow with ribbon that elevates an ordinary gift, wreath, or centerpiece into something genuinely special. It is the finishing touch that signals care and thoughtfulness — the detail that makes someone pause before they even open the package. Yet for many people, making a ribbon bow that actually looks polished and full rather than flat and lopsided feels mysteriously out of reach.
The good news is that making a stunning bow with ribbon is a learnable skill, not an inborn talent. Once you understand the mechanics behind why a bow looks full and balanced, and once your hands have practiced the motion a handful of times, the process becomes fast, intuitive, and genuinely enjoyable. Whether you’re wrapping holiday gifts, decorating a front door wreath, styling a wedding arch, or adding flair to a baby shower centerpiece, the right ribbon bow technique makes all the difference.
This complete guide covers everything from choosing the right ribbon for your project to mastering the classic florist bow, the multi-loop bow, the easy gift bow, and the elegant French bow. You’ll also learn about the tools that make the process easier, the most common mistakes beginners make, and how to customize your bows for every season and occasion. By the time you finish reading, you’ll have everything you need to make a bow with ribbon that looks like it came straight from a professional gift shop or floral studio.
Choosing the Right Ribbon for Your Bow
Before you loop a single strand of ribbon, the most important decision you’ll make is choosing the right ribbon for the job. Not all ribbons behave the same way, and selecting the wrong type for your project is the most common reason home crafters end up with flat, unimpressive bows that won’t hold their shape.
Wired Ribbon
Wired ribbon is the undisputed favorite of professional florists, wreath makers, and gift wrappers for one simple reason: it holds its shape. A thin wire runs along both edges of the ribbon, allowing each loop to be shaped, adjusted, and fluffed after the bow is formed. Once you work with wired ribbon, it is hard to go back to anything else for large decorative bows.
Wired ribbon is available in virtually every width, pattern, and material — from sheer organza to thick burlap to classic satin — and it is the best choice for wreath bows, door decorations, and any bow with ribbon that needs to maintain its structure over time or in outdoor conditions.
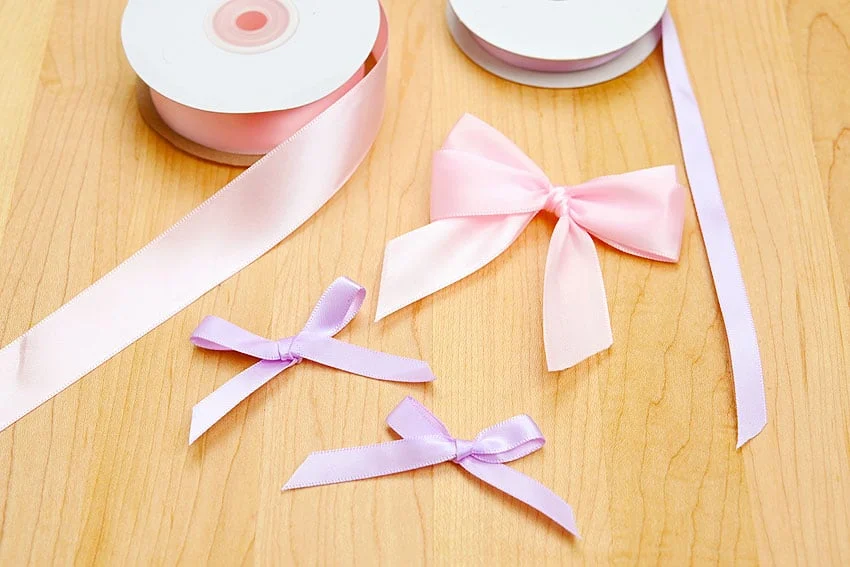
Satin Ribbon
Satin ribbon is the go-to choice for gift wrapping and package decoration. Its smooth, lustrous surface catches light beautifully and gives bows a clean, elegant appearance. It is less forgiving than wired ribbon for large multi-loop bows, as it tends to flatten under its own weight, but for smaller gift bows and hair accessories it is both practical and gorgeous.
Double-faced satin — which has a glossy finish on both sides — is the premium version and the one most florists and professional gift wrappers prefer because both sides of every loop look equally polished when the bow is finished.
Grosgrain Ribbon
Grosgrain ribbon has a distinctive ribbed texture that gives it a more casual, textured look compared to satin. It is sturdier and holds its shape reasonably well without wire, making it a good all-around choice for gift bows, hair bows, and craft projects. It is particularly popular for children’s accessories and school-themed décor because its matte, textured finish feels approachable and fun rather than formal.
Organza and Sheer Ribbon
Organza ribbon is lightweight, translucent, and ethereally beautiful when layered or gathered into a full bow with ribbon. It is a popular choice for weddings, bridal showers, and any occasion with a romantic or delicate aesthetic. Because it is so lightweight, it benefits greatly from a wire edge to give the loops structure. Without wire, organza bows tend to droop and collapse fairly quickly.
Burlap and Fabric Ribbon
Burlap ribbon has surged in popularity for rustic, farmhouse, and seasonal décor. It is thick, textured, and full of natural character. A bow with ribbon made from burlap wired ribbon is ideal for fall wreaths, Thanksgiving tablescapes, and country-style front door decorations. It pairs beautifully with natural elements like pine cones, dried cotton stems, and preserved eucalyptus.
Tools That Make Bow-Making Easier
You don’t need many tools to make a beautiful bow with ribbon, but having the right ones on hand saves time and dramatically improves the finished result.
Floral Wire or Pipe Cleaners
A short length of floral wire or a pipe cleaner is essential for securing the center of your bow. It creates a tight, neat cinch at the middle that holds all the loops in place while still being flexible enough to attach the bow to a package, wreath, or arrangement. Twist ties work in a pinch, but floral wire gives a cleaner, more professional result.
Sharp Scissors
The quality of your ribbon cuts matters more than most people expect. Frayed, uneven cuts make even the most carefully constructed bow look sloppy. Use sharp fabric scissors and cut decisively in one clean motion. For satin and organza ribbons, cutting at a 45-degree angle or into a V-shape at the tail ends gives a more polished, professional finish and prevents fraying.
A Bow Maker Tool
Bow maker tools — sometimes called bow loom tools — are simple plastic or wooden devices that help you create consistent, evenly sized loops without having to measure or judge by eye. They are particularly useful when making matching bows for multiple gifts or when working with slippery satin ribbon that shifts during forming. They are inexpensive and widely available at craft stores and online retailers.
A Hot Glue Gun
For bows that will be attached to wreaths, decorative arrangements, or craft projects, a hot glue gun provides a strong, clean bond. It is far more reliable than regular craft glue for securing ribbon bows to surfaces and holds up well even with the weight of larger, multi-loop bows.
How to Make a Classic Florist Bow with Ribbon
The classic florist bow is the full, round, multi-loop style you see on professionally decorated wreaths, floral arrangements, and holiday front doors. It looks complex but follows a completely repeatable pattern once you understand the technique.
Getting Started
Choose a wired ribbon that is at least 2.5 inches wide — wider ribbon creates more impressive, voluminous loops. Cut a length of about 3 to 4 yards for a large decorative bow, or 2 yards for a medium-sized one. Have a 6-inch piece of floral wire nearby before you begin.
Forming the Center Loop
Hold the ribbon between your thumb and index finger, leaving about 8 to 10 inches hanging free — this will become one of the bow’s tails. With your other hand, fold the ribbon back toward your pinching fingers to form a small loop, about 3 to 4 inches in diameter, and pinch it firmly against the tail end. This center loop is the foundation of your entire bow with ribbon and needs to stay firmly pinched throughout the forming process.
Building the Loops
Twist the ribbon a half-turn at the pinch point so the front-facing side of the ribbon always faces outward, then bring the ribbon up and around to form the first large loop on the right side of the center. Bring the ribbon back to the pinch point, twist again, and form a matching loop on the left side. Continue this process — always twisting before each loop and alternating sides — until you have four to five loops on each side.
The twist at the pinch point is the most important technique in florist bow making. It keeps the decorative front face of the ribbon always facing outward on every loop, which is what gives the finished bow its clean, professional appearance. Skipping the twist is the most common reason beginner bows look messy or one-dimensional.
Securing and Fluffing
Once you have your desired number of loops, leave another 8 to 10 inches of ribbon for the second tail and cut. Thread your floral wire through the center loop and twist it tightly around the entire pinch point, gathering all the loops together at the middle.
Now comes the most satisfying part — fluffing. Gently pull each loop outward and upward, rotating them to fill out a full circular shape. Adjust the wire edge of each loop to create dimension, curl, and volume. A well-fluffed bow with ribbon should look round and full from every angle, not flat or one-dimensional.
How to Make an Easy Gift Bow with Ribbon
The gift bow is a simpler, smaller-scale version designed to sit beautifully on top of a wrapped package. It requires less ribbon and fewer steps than the florist bow but still creates a polished, celebratory result.
The Loop-and-Cross Method
Cut a length of ribbon approximately 30 to 36 inches long. Hold one end and make a loop, then cross the ribbon over itself and make a second loop in the opposite direction, forming a simple crossed loop shape. Continue crossing and looping until you have three or four loops on each side.
Pinch the center tightly, then tie a short separate piece of ribbon around the middle and double-knot it firmly. Fan out the loops evenly on all sides. Use scissors to curl the tail ends by pressing the ribbon firmly against the blade of the scissors and pulling downward in one smooth motion — this creates elegant curled tails that frame the bow beautifully.
This method produces a classic gift-top bow with ribbon that takes less than two minutes once you’ve practiced it a couple of times.
The Flat Bow for Packages
For a flatter, more streamlined bow that suits minimalist or modern wrapping styles, wrap the ribbon around the package lengthwise and crosswise, tying it in a simple overhand knot at the top. Then form two equal loops with the remaining ribbon and tie them together in a standard bow knot — exactly like tying a shoelace, but with wider, more deliberate loops. Trim the tails evenly and curl them if desired.
How to Make a French Bow with Ribbon
The French bow is an elegant, understated style that uses fewer loops than the florist bow but achieves a graceful, flowing result that is popular for wedding décor, gift baskets, and upscale event styling.
Forming the French Bow
Cut a length of ribbon approximately 24 to 30 inches. Fold it in half to find the center point. Cross the ribbon at the center to form two equal loops, as if you were about to tie a standard bow knot. Instead of pulling the loops tight, adjust them to your desired size and tie a narrow contrasting ribbon or floral wire tightly around the exact center.
Fan the two loops gently outward and shape their edges. The French bow has a simple, two-loop silhouette that looks intentional and refined rather than elaborate. It works beautifully in pairs attached to chair backs at weddings, tied around napkin rings, or secured to the handle of a gift bag.
A bow with ribbon in the French style communicates quiet elegance — it is the choice of decorators who understand that restraint can be more powerful than abundance.
How to Make a Pull-Bow with Ribbon
Pull-bows are pre-looped ribbon bows sold coiled in a flat disc and activated by pulling a center string. While they are not hand-formed in the traditional sense, knowing how to use them properly produces impressive results quickly and makes them worth including in any bow-maker’s toolkit.
Hold the disc firmly in one hand and grip the center pull string with the other. Pull the string steadily and firmly — not in a jerky motion — watching the loops spring upward into a full, rounded bow shape. Once the bow is fully formed, wrap the excess string twice around the center and tuck it neatly behind the bow.
The trick most people miss with pull-bows is the fluffing step. After pulling, use your fingers to separate and adjust each individual loop, pulling them outward and creating a three-dimensional shape. An unfluffed pull-bow looks synthetic and flat; a properly fluffed one looks surprisingly full and dimensional for something so quick to assemble.
Seasonal and Occasion-Specific Bow Ideas
One of the most enjoyable aspects of mastering the bow with ribbon is the creative freedom it opens up across every season and occasion throughout the year.
Holiday and Christmas Bows
Classic Christmas bows use wide wired ribbon in traditional red, green, gold, or plaid patterns. A large florist-style bow in red and gold wired ribbon attached to a front door wreath or garland creates immediate seasonal impact. For a more modern holiday aesthetic, try deep navy or forest green ribbon with silver wire-edge accents, or matte black ribbon paired with natural dried orange slices and cinnamon sticks.
Wedding and Bridal Bows
Wedding bows lean toward ivory, blush, champagne, and white in satin, organza, or velvet ribbon. A French bow in double-faced ivory satin is a classic choice for pew decorations, bouquet wrapping, and gift presentation at bridal showers. For a more bohemian wedding style, silk ribbon in dusty rose or sage green creates a relaxed, organic bow that feels artful without being overly formal.
Fall and Harvest Bows
Fall is peak season for decorative bows. Burlap wired ribbon, plaid flannel ribbon, and deep jewel-tone velvet ribbon are all perfect for autumn wreaths and Thanksgiving tablescapes. Combining two different ribbon types — a wide burlap base with a narrow buffalo check layered on top — in a single bow adds depth, texture, and visual interest that a single ribbon cannot achieve alone.
Spring and Easter Bows
Spring bows call for light, cheerful colors and delicate textures. Pastel satin in lavender, mint, butter yellow, and soft coral creates fresh, celebratory bow with ribbon designs perfect for Easter baskets, spring wreaths, and Mother’s Day gifts. Gingham ribbon in pastel checks is perennially charming for this season and pairs beautifully with fresh flowers and greenery.
Common Bow-Making Mistakes and How to Avoid Them
Even experienced crafters fall into predictable traps that prevent their bows from reaching their full potential. Understanding these common errors makes you a faster, more confident bow-maker from the very beginning.
Not twisting the ribbon at the pinch point during florist bow construction is the single most widespread mistake. Without the twist, the back of the ribbon faces outward on alternating loops, creating an uneven, patchy appearance. The twist takes a fraction of a second and makes an enormous visible difference.
Using ribbon that is too narrow for the bow size you are attempting results in a bow that looks spindly and underwhelming regardless of how many loops you add. Match the ribbon width to the bow scale — wide ribbon for large decorative bows, narrow ribbon for small gift bows and hair accessories.
Cutting tails to unequal lengths creates an asymmetrical bow that reads as an error rather than a design choice. Measure or fold your ribbon to confirm equal tail length before making the final cut.
Skipping the fluffing step produces flat, lifeless bows. Every bow with ribbon — whether florist, French, or pull-bow style — looks dramatically better after two minutes of patient loop separation and shaping.
Conclusion: Practice Makes Every Bow with Ribbon Better
Making a beautiful bow with ribbon is one of those craft skills that rewards patience and repetition generously. Your first attempt may not be perfect, and that is completely normal. The mechanics of twisting, pinching, and looping take a little time to become muscle memory, but once they do, the process becomes quick, meditative, and genuinely satisfying.
Start with wired ribbon — it is the most forgiving material and gives you the best results while you are still building confidence. Practice the florist bow until the twist-and-loop sequence feels natural, then branch out into the French bow and gift bow styles. Experiment with different ribbon combinations for different seasons and watch how much impact a single well-made bow with ribbon has on the people who receive your gifts and see your decorations.
The craft stores, floral suppliers, and online ribbon retailers have never offered a wider, more inspiring selection of ribbons than they do right now. The only thing standing between you and stunning bows is a little practice — and now you have everything you need to get started.
Frequently Asked Questions (FAQs)
Q1: What is the easiest type of bow with ribbon to make for beginners?
The easiest bow for beginners is the simple gift bow using the loop-and-cross method. It requires only about 30 inches of ribbon, no special tools, and takes less than two minutes to make. Wired ribbon is the most beginner-friendly material because it holds its shape even if your loops are slightly uneven. Once you master this style, the florist bow and French bow are natural next steps.
Q2: How much ribbon do I need to make a bow?
The amount of ribbon depends on the bow style and size. A small gift bow needs approximately 24 to 36 inches of ribbon. A medium decorative bow for a wreath or package requires about 2 yards. A large florist bow for a front door wreath or floral arrangement typically uses 3 to 4 yards. When in doubt, cut more than you think you need — you can always trim the tails shorter, but you cannot add ribbon back once it is cut too short.
Q3: How do I make a bow with ribbon that holds its shape?
The best way to ensure a bow holds its shape is to use wired ribbon, which has a thin wire running along both edges that allows each loop to be shaped and adjusted without collapsing. Securing the center tightly with floral wire rather than just tying it also helps maintain the bow’s structure. For non-wired ribbons, applying a light mist of starch spray before forming the bow adds stiffness and helps the loops hold their position longer.
Q4: Can I make a bow with ribbon without any special tools?
Absolutely. All the classic bow styles — florist, French, gift, and pull-bow — can be made with nothing more than ribbon, sharp scissors, and a short piece of floral wire or a twist tie. A bow maker tool and hot glue gun are helpful accessories but by no means essential, especially for beginners working on standard gift wrapping or small decorative projects.
Q5: What ribbon width is best for making bows?
Ribbon width should match the scale of the finished bow. For large decorative bows on wreaths and door decorations, use ribbon that is 2.5 to 4 inches wide — anything narrower will look sparse and insubstantial at that scale. For standard gift bows, 1.5 to 2.5 inch ribbon is ideal. For hair bows, small package accents, and delicate craft projects, ribbon between 0.5 and 1 inch wide is appropriate. Using ribbon that is too narrow for the scale of your project is one of the most common reasons bows look underwhelming despite correct technique.