There is something deeply satisfying about walking into a freshly painted room. The walls look crisp, the color feels intentional, and the entire space seems renewed without spending a fortune on renovation. If you have been putting off this project because it feels overwhelming, the truth is that learning how to paint a room is far more approachable than most people expect — as long as you follow the right process from start to finish.
The difference between a paint job that looks amateur and one that looks professionally done rarely comes down to natural talent. It almost always comes down to preparation, patience, and knowing which steps matter most. This guide walks you through everything — from choosing the right paint to laying down that final coat — so you can tackle any room in your home with confidence.
Why Preparation Is the Most Important Part of How to Paint a Room
Ask any professional painter what separates a good result from a great one, and they will tell you the same thing: preparation. Most people want to skip straight to rolling color onto the walls, but the prep work is where the real quality gets built. Understanding how to paint a room properly means accepting that the painting itself is actually the easier half of the job.
Start by clearing the room as much as possible. Move furniture to the center and cover it with drop cloths or old sheets. Remove switch plates, outlet covers, and any wall hardware. Take down curtain rods if you can — painting around them is far more difficult than simply pulling them out temporarily. The more obstacles you remove from the room, the more freely you can move and the cleaner your lines will be.
Cleaning and Repairing the Walls
Walls collect more dirt, grease, and grime than most people realize, especially in kitchens and hallways. Paint does not bond well to dirty surfaces, and skipping this step is one of the most common reasons a DIY paint job looks patchy or peels prematurely. Wipe down every wall with a damp cloth or a mild cleaning solution. For areas near the stove or above the sink, a degreaser works better.
After cleaning, inspect the walls closely for cracks, holes, and dents. Small nail holes can be filled with lightweight spackle using your fingertip or a putty knife. Larger cracks may need a two-step fill with joint compound, allowing each layer to dry fully before sanding. Once the repairs are dry, sand them smooth and wipe away the dust with a tack cloth. Running your hand along the wall is a good way to feel for uneven patches that your eyes might miss.
Taping and Protecting Surfaces
Painter’s tape is one of those supplies people either use too little of or apply incorrectly. Press it firmly along the edges of trim, baseboards, window frames, and ceiling lines to get a clean boundary between surfaces. The key is to press down the edge of the tape that faces your paint — if that edge lifts even slightly, paint will bleed underneath and ruin your lines.
Lay drop cloths on the floor along every wall. Canvas drop cloths are far superior to plastic ones because they absorb drips rather than letting them spread. A single misplaced step on a plastic sheet covered in wet paint can send a footprint across your floor before you even notice.
Choosing the Right Paint and Finish
Knowing how to paint a room also means knowing what you are putting on the walls. The paint aisle at any hardware store can feel overwhelming, but the decision is simpler than it looks once you understand two things: the type of paint and the finish.
For most interior walls, a water-based latex paint is the go-to choice. It dries faster, cleans up with soap and water, and has come a long way in terms of durability and coverage. Oil-based paints are still used for trim and cabinetry, but they are less practical for large wall surfaces because of their longer drying times and the need for mineral spirits for cleanup.
Understanding Paint Finishes
The finish you choose affects both the appearance and the practicality of the painted surface. A flat or matte finish hides imperfections beautifully but is harder to clean, making it best suited for low-traffic areas like adult bedrooms and formal dining rooms. An eggshell finish has a slight sheen and is much easier to wipe down, making it the most popular choice for living rooms and hallways. Satin is a step up in sheen and durability, ideal for kids’ rooms and family spaces that see heavy daily use. Semi-gloss and gloss finishes are typically reserved for trim, doors, and kitchens and bathrooms where moisture resistance is important.
According to the experts at the Paint Quality Institute, investing in a higher-quality paint almost always results in better coverage, longer-lasting color, and fewer coats needed — which ultimately saves both time and money over the life of the paint job.
How Much Paint Do You Actually Need?
A standard rule of thumb is that one gallon of paint covers approximately 350 to 400 square feet with one coat. Measure your room’s total wall area by multiplying the perimeter by the ceiling height, then subtract the area of any doors and windows. Most rooms of average size require two gallons for two coats, but buying a little extra is never a bad idea — especially if you want touch-up paint available down the road.
The Right Tools Make How to Paint a Room Dramatically Easier
Even the best paint in the world will not perform well if you apply it with the wrong tools. A quality brush and roller are not luxuries — they are the difference between smooth, even coverage and streaky, uneven walls.
For cutting in along edges and corners, a two-to-two-and-a-half-inch angled brush gives you the control you need. Cheap brushes shed bristles into your wet paint and do not hold enough paint to lay down a smooth stroke. A nylon or polyester brush works well with latex paints and is worth the modest extra cost.
For rolling the large flat areas of your walls, a nine-inch roller with a half-inch nap is the standard choice for smooth to slightly textured surfaces. A thicker nap (three-quarters of an inch or more) is better for heavily textured surfaces because it pushes paint further into the texture. Use a roller extension pole — your back will thank you, and rolling from a natural standing position actually gives you better control than working on a stepladder.
A roller tray is fine for small jobs, but a five-gallon bucket with a roller screen makes the process faster and less messy for larger rooms. You can load your roller more efficiently and keep the paint from drying out in the tray.
Priming: The Step That Too Many People Skip
If you are covering a dark color with a lighter one, painting over a stained wall, or working with new drywall that has never been painted, a primer coat is not optional. Primer seals the surface, blocks stains, and gives the topcoat something consistent to bond to. Without it, you may find yourself applying three or four coats of paint trying to achieve the coverage that one coat of primer plus two coats of paint would have delivered.
Self-priming paints exist and work reasonably well in straightforward situations — like repainting a wall in a similar color. But when the conditions are more demanding, a dedicated primer is always the smarter choice. Tinted primer, where you ask the paint store to tint it close to your final wall color, gives you even better coverage and can reduce the number of topcoats needed.
How to Paint a Room: The Actual Painting Process
With your prep complete, your supplies ready, and your primer dry, you are finally ready for the part everyone pictures when they think about how to paint a room. The technique you use matters just as much as the quality of your materials.
Cutting In First, Rolling Second
Always begin by cutting in — painting a strip of color approximately two to three inches wide around all the edges of the room using your angled brush. This includes along the ceiling line, down the corners, along the baseboards, and around any doors or windows. Do not obsess over getting a razor-sharp line at this stage; the tape is doing that job. Focus on laying down smooth, consistent coverage.
Once the cut-in sections are painted, move immediately to rolling the flat areas while the cut-in paint is still wet. This is a detail that many beginners miss. When you roll up to a wet cut-in edge, the two sections blend together naturally. If the cut-in has already dried before you roll, you can sometimes see the boundary between the two applications — especially in certain lighting conditions.
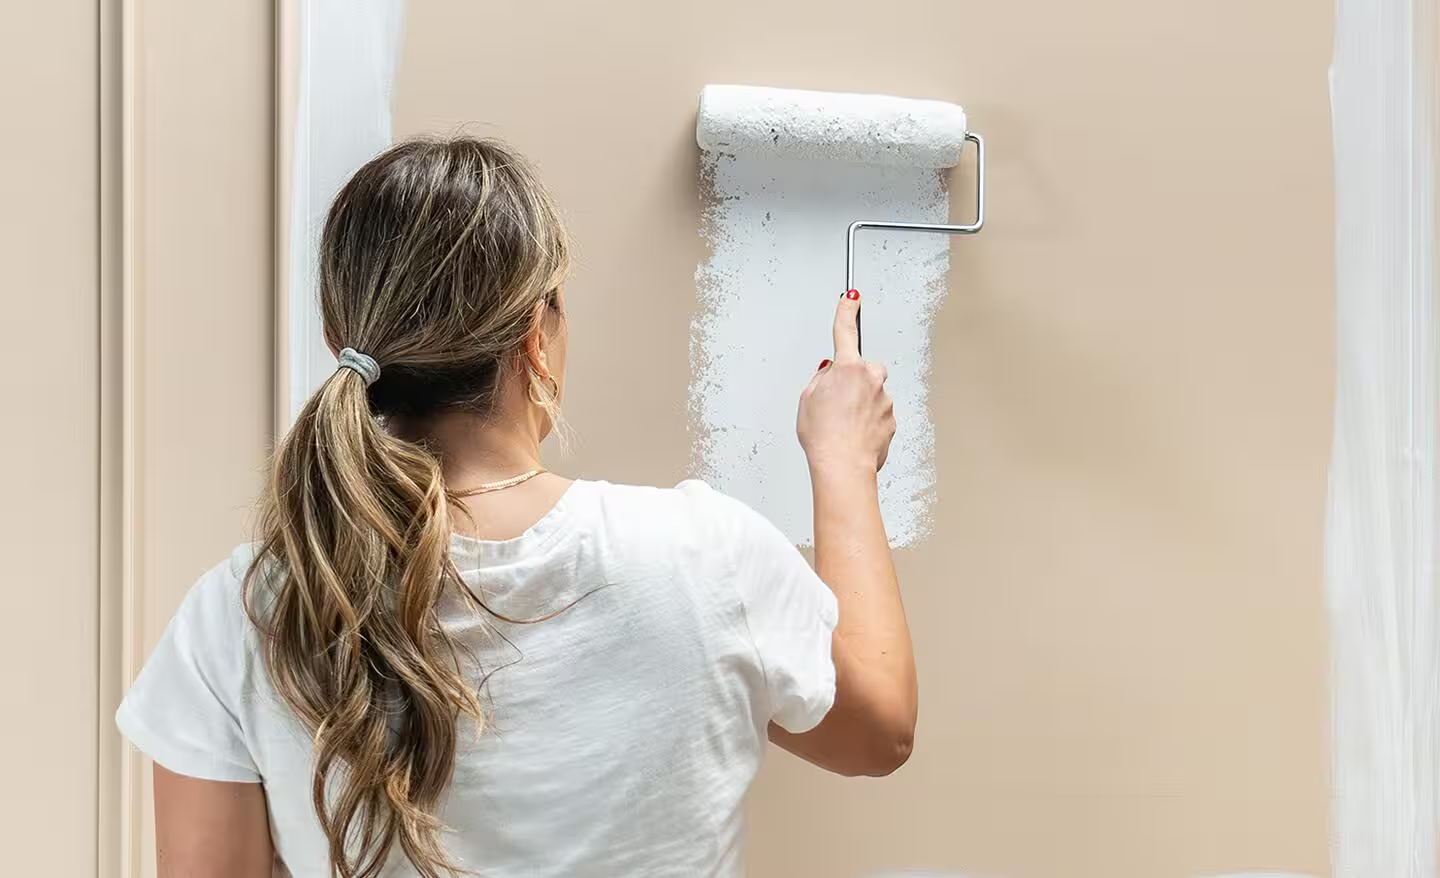
Rolling Technique for Even Coverage
Load your roller fully but not dripping, and begin applying paint in a large W or M pattern on the wall. This spreads the paint out before you begin the even strokes that blend everything together. Work in sections of about three to four feet wide and always keep a wet edge — meaning you overlap into the previously rolled section before it dries. This prevents lap marks, which are those subtle lines that appear when paint dries in overlapping layers.
Apply two coats for the best result. Allow the first coat to dry fully — usually a minimum of two to four hours for latex paint, though overnight drying between coats is even better. The second coat is what gives you that rich, even color depth you see in professionally painted rooms. Do not try to rush the process by applying a thick single coat; thin, even coats always produce a better finish.
Removing the Tape and Touching Up
Once the final coat is completely dry to the touch, remove the painter’s tape carefully. Pull it back at a 45-degree angle rather than straight off the wall — this technique reduces the chance of pulling paint away with the tape. If you notice any bleed-through or ragged edges, touch them up with a small brush once everything is fully cured.
Step back, look at the room in different lighting conditions — natural daylight, overhead light, and lamp light — to catch any thin spots or missed areas before you put everything away.
Cleaning Up and Caring for Your Painted Walls
A freshly painted room deserves proper care to keep it looking its best. Do not hang pictures or press furniture against the walls for at least a week after painting, even if the paint feels dry. Latex paint continues to cure and harden for several days after it dries to the touch, and pressing against it prematurely can leave marks.
Wash your brushes and rollers thoroughly in warm, soapy water if you used latex paint. Wrap them in plastic wrap or aluminum foil if you plan to reuse them the next day — this keeps them fresh without a full wash every session. Store any leftover paint with the lid sealed tightly; use a rubber mallet rather than a hammer to avoid distorting the lid. Label the can with the room name, color name, and date so touch-ups are effortless in the future.
For ongoing maintenance, most eggshell and satin finishes can be gently wiped with a damp cloth to remove scuffs and fingerprints. Avoid abrasive cleaners, which can dull the sheen and damage the paint film over time.
Common Mistakes to Avoid When Painting a Room
Even experienced DIYers run into avoidable problems. Skipping the second coat is one of the most frequent mistakes — it almost always results in uneven color and thin patches that become more obvious as time passes. Painting in a cold or excessively humid room is another issue; temperature and humidity affect how paint dries, and working outside the ideal range can cause poor adhesion, bubbling, or extended drying times.
Using the wrong roller nap for your wall texture leads to either too little coverage in the recesses of textured walls or an orange-peel effect on smooth walls. And overloading the brush — dipping it too deep into the paint — causes drips and uneven application that is hard to correct once it dries.
The more you understand about how to paint a room before you begin, the fewer surprises you will encounter along the way.
Conclusion: How to Paint a Room Is a Skill Worth Mastering
Painting your own room is one of the most rewarding home improvement projects you can take on. It is cost-effective, genuinely achievable for any skill level, and the results are immediately transformative. More importantly, once you have done it well once, every future project feels faster and more intuitive.
The key lesson that runs through every stage of this guide is that learning how to paint a room is really about learning to respect the process. Prepare thoroughly, choose quality materials, work methodically, and give each coat the time it needs to dry. Do those things, and the results will speak for themselves — clean lines, rich color, and a finish that looks like it cost far more than it did.
Whether you are refreshing a tired bedroom, giving a living room a fresh personality, or working your way through an entire home, the skills you build with each room make the next one easier, faster, and even more satisfying.
Frequently Asked Questions
Q1. How long does it take to paint a room from start to finish?
For an average-sized room (around 12 by 12 feet), the full process — including prep, priming if needed, two coats of paint, and cleanup — typically takes one to two full days. If you spread the work over a weekend, the first day covers prep and the first coat, and the second day handles the second coat once everything has dried properly overnight.
Q2. Do I always need to use primer before painting a room?
Not always, but more often than people think. You need primer when painting over a dark or bold color with a lighter shade, when covering stains or water damage, when working on new or bare drywall, or when switching from oil-based to latex paint. In straightforward repaints where the color change is minor and the existing surface is in good condition, a quality self-priming paint may be sufficient.
Q3. How do I get perfectly straight lines where the wall meets the ceiling?
The best approach is a combination of good painter’s tape and a steady hand with an angled brush. Apply the tape along the ceiling edge, press it firmly, and use a two-inch angled brush to cut in slowly and carefully. Some experienced painters skip the tape entirely and free-hand the line once they develop enough brush control, but for most homeowners, tape plus a quality brush delivers the cleanest result.
Q4. How many coats of paint does a room need?
Two coats is the standard for most interior paint jobs. One coat rarely provides the depth of color or the even coverage that makes a room look finished and professional. In some cases — particularly when using a very deep or saturated color, or when covering a dramatically different shade — a third coat may be needed in certain areas.
Q5. What is the best order to paint a room — ceiling, walls, or trim first?
The most efficient order is ceiling first, walls second, and trim last. Painting the ceiling first means any drips or roller spray that lands on the walls will simply be covered when you paint the walls. Painting trim last allows you to cut in crisp, sharp lines against the already-finished walls, which produces the cleanest final result.
How to Make Coffee Without a Coffee Maker