There is something deeply satisfying about a picture hanging straight, centered, and exactly where you envisioned it on a wall. And yet, for something that sounds so simple, the process of hanging a picture trips up even the most capable DIY enthusiasts. Crooked frames, misplaced nails, crumbling drywall, and that one hole you wish you had never made — these are the all-too-common results of rushing the job.
The good news is that learning how to hang a picture properly is a skill anyone can master with a bit of patience, the right tools, and a clear step-by-step understanding of the process. Whether you are decorating a brand-new home, refreshing a tired living room, or finally getting around to displaying that piece of art you have had leaning against the wall for months, this guide covers everything you need to know to hang a picture with confidence and precision.
Why Getting It Right the First Time Matters
Before diving into the how-to, it is worth taking a moment to understand why careful preparation pays off. Every unnecessary hole you put in a wall needs to be patched and painted — a time-consuming and sometimes costly fix. Plaster walls can crack if you hit them incorrectly. Drywall without a stud or anchor cannot support a heavy frame and can fail without warning. And no matter how beautiful the artwork, a visibly tilted or poorly placed frame distracts more than it decorates.
When you take the time to hang a picture properly, you are not just following a process — you are making a decision that affects the look and feel of your entire room for years to come. Getting it right the first time saves you effort, protects your walls, and produces a result you will genuinely be proud of.
Tools You Will Need Before You Begin
One of the most common reasons picture hanging goes wrong is attempting the job without the right equipment. Before you hang a picture of any size or weight, gather these essentials.
A measuring tape is non-negotiable. Eyeballing distances leads to mistakes that become obvious the moment you step back. A level — either a traditional bubble level or a smartphone app version — ensures your frame sits perfectly horizontal. A pencil is your best friend for marking positions lightly on the wall without making permanent marks. A hammer and nails handle the vast majority of everyday hanging jobs, while a drill becomes necessary for heavier pieces or harder wall surfaces. And wall anchors are essential any time you cannot locate a stud directly behind your chosen hanging spot.
Having everything ready before you start means the job flows smoothly from beginning to end without frustrating interruptions.
Step One: Choose the Right Height
The single most important decision when you hang a picture is where on the wall it goes — and specifically, how high. Interior designers and museum curators have long agreed on a remarkably practical rule of thumb: the center of a picture should sit at approximately 57 to 60 inches from the floor. This range corresponds to the average human eye level and is the standard used in professional gallery installations around the world.
In practice, this means you measure 57 to 60 inches up from the floor, make a light pencil mark, and treat that point as the center of your artwork. Everything else — the hook placement, the nail position — flows from there.
Of course, rules exist to be broken with intention. If you are hanging a picture above a sofa, console table, or fireplace mantel, the visual relationship between the art and the furniture matters more than absolute height. In those cases, aim to leave around 6 to 8 inches of wall space between the top of the furniture and the bottom of the frame. This keeps the piece connected to what is below it rather than floating disconnected on the wall.
Step Two: Find the Right Spot on the Wall
Before you drive any nail or hook into your wall, you need to understand what is behind it. Drywall alone cannot reliably support heavy frames — for anything over a few kilograms, you want your nail or screw anchored into a wall stud.
Studs are the vertical wooden framing members behind your drywall, typically spaced 16 inches apart in most residential construction. A stud finder — an inexpensive and widely available tool — takes the guesswork out of locating them. Alternatively, you can use the knock test: knock along the wall with your knuckle and listen for the sound to shift from hollow to solid. That solid sound indicates a stud.
If your ideal picture placement does not fall over a stud, use a wall anchor. These small plastic or metal inserts expand inside the drywall when a screw is driven into them, distributing the load and preventing the screw from simply pulling through. Always match the anchor to the weight it needs to support — the packaging will indicate the load rating clearly.
For lighter frames under about 2 kilograms, a standard picture hook and nail driven at a 45-degree angle into drywall is perfectly adequate and requires no anchor at all.
Step Three: Measure the Hardware on Your Frame
This is the step that most people skip — and it is the one that causes the most grief. Knowing where the center of your picture should land is only half the equation. You also need to know exactly where the hanging point on the back of the frame is, because that is what actually touches the wall.
If your frame has a wire across the back, hold the wire taut at the height it would be when hanging, and measure the distance from the top of the frame down to the highest point of the taut wire. That measurement tells you how far below the top of the frame your nail should be placed.
If your frame has D-ring hangers or a sawtooth bracket instead of a wire, measure from the top of the frame down to the center of the hanging hardware. That distance is how far below your desired center-height mark the nail needs to go.
Write this measurement down. It sounds simple, but forgetting it mid-process and having to remeasure is one of the great frustrations of trying to hang a picture quickly.
Step Four: Mark the Wall Accurately
With your eye-level mark already on the wall and your hardware measurement in hand, the math is straightforward. From your center-height pencil mark, subtract the distance from the top of the frame to the hanging point. The result is how far above your center mark the nail should go.
For example: if your center mark is at 58 inches and your wire sits 3 inches below the top of the frame, your nail needs to go at 58 inches plus the distance from the hanging point to the top of the frame. Work this out carefully and mark it lightly with a pencil.
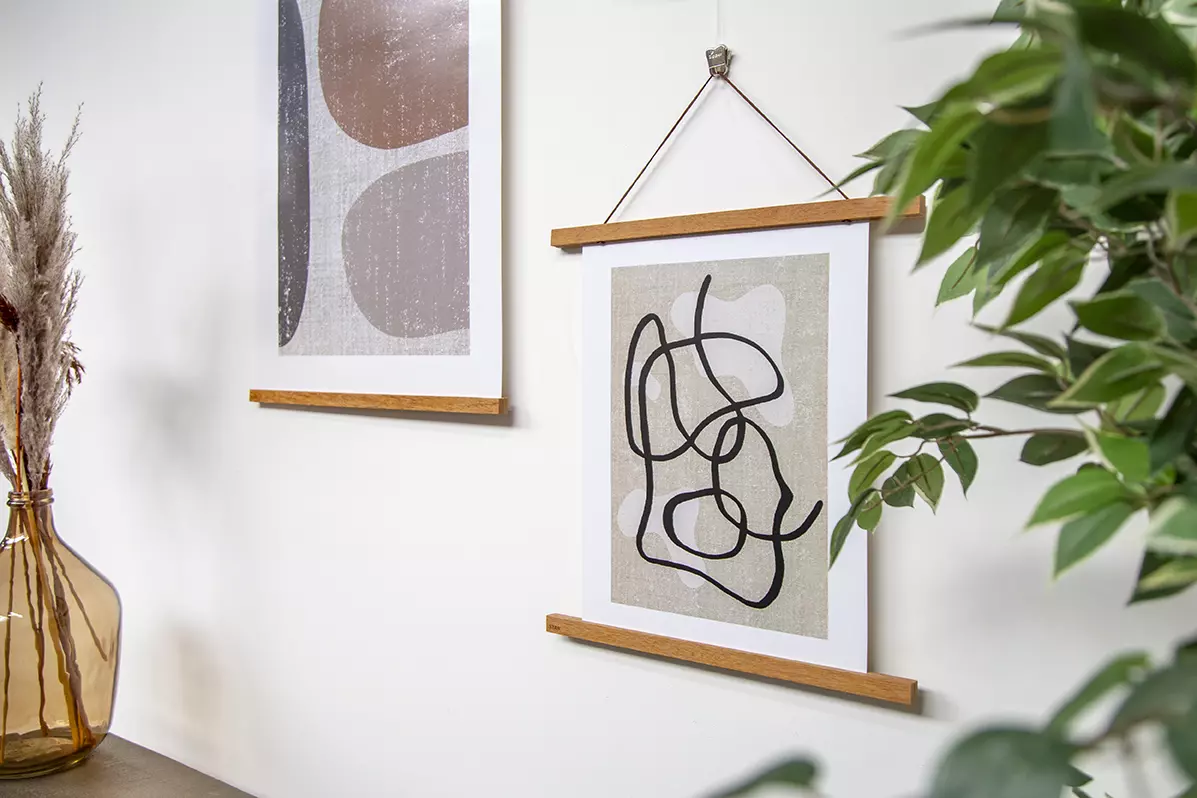
Use your level at this stage too. If you are hanging two frames side by side, a level line connecting both nail marks ensures they will sit at exactly the same height — something that is almost impossible to judge accurately by eye alone.
Step Five: Drive the Nail or Install the Anchor
With your mark in place, it is time to hang a picture with the actual hardware. For standard drywall and lightweight to medium frames, drive a nail at a 45-degree downward angle into the wall. This angle gives the nail far more holding strength than a straight horizontal drive because the frame weight pushes down along the nail rather than pulling it straight out.
If you are using a wall anchor, first drill a hole using the bit size specified on the anchor packaging. Tap the anchor flush into the hole, then drive your screw into the anchor until it is snug — but do not overtighten, as this can strip the anchor.
For very heavy artwork — large canvases, ornate mirrors, multi-frame gallery walls — consider using two hanging points rather than one. Distributing the weight across two hooks significantly increases stability and also makes the frame far less likely to swing crooked over time.
Step Six: Hang and Level the Frame
Now comes the satisfying part. Carefully lift the frame and place the wire or hardware onto the nail or hook. Step back and take an honest look. Even with precise measurements, frames sometimes hang slightly off due to wire stretch, uneven hardware, or minor wall irregularities.
Place your level across the top of the frame and adjust as needed. Most picture hooks allow for a small amount of side-to-side movement, which makes fine adjustments easy without redriving the nail.
If you find the frame consistently tilts to one side, a pair of adhesive rubber bumpers on the lower back corners of the frame can help stabilize it against the wall. These small additions also protect your wall surface from scuff marks — a small but worthwhile detail.
Hanging Pictures on Special Wall Types
Not every wall is standard drywall, and when you hang a picture on tile, brick, concrete, or plaster, the approach changes somewhat.
Brick and Concrete Walls
Masonry walls require masonry drill bits and masonry anchors — standard drill bits will not penetrate these materials effectively. The process is slower and noisier, but the result is a hook anchored into an extremely strong surface that can support considerable weight. Adhesive hooks rated for masonry are also available for lighter frames and are a sensible no-drill option.
Plaster Walls
Older homes often have plaster over lath construction rather than modern drywall. Plaster is harder than drywall but more brittle, and it can crack if you hammer a nail in at full force. The best approach is to pre-drill a pilot hole at a lower speed setting, then drive your nail or screw gently. Avoid hanging very heavy frames on plaster without locating the lath behind it, as the plaster itself has limited load-bearing capacity.
Tiled Surfaces
Hanging frames directly on tiles is rare, but sometimes necessary in kitchens or bathrooms. Use a specialized tile drill bit and work slowly with light pressure to avoid cracking the tile. Adhesive hooks specifically rated for tile surfaces are often a more practical solution.
Gallery Walls: How to Hang Multiple Pictures as a Group
A gallery wall — a curated arrangement of multiple frames — is one of the most impactful ways to decorate a large empty wall. But it requires a more deliberate planning process than hanging a single picture.
Start by laying all your frames out on the floor in roughly the arrangement you envision. Live with that arrangement for a day or two, shuffling pieces until you are happy with the composition. Photograph it before you touch the wall.
Trace each frame on paper, cut the shapes out, and tape the paper templates to the wall with painter’s tape. This gives you a full-scale preview of your gallery before a single nail goes in. Adjust freely — this is your chance to experiment without consequences.
Once you are satisfied, mark your nail positions through the templates, remove the paper, and hang a picture at a time, starting from the center of the arrangement and working outward. This approach keeps the overall composition balanced and gives you the best control over the final result.
Common Mistakes to Avoid When Hanging Pictures
Even experienced decorators make these errors. Knowing them in advance saves you time and wall damage.
Hanging pictures too high is the most universal mistake. People instinctively want artwork to be higher than eye level, but this creates visual disconnection and makes a room feel top-heavy. Stick to the 57–60 inch center rule unless you have a deliberate reason to deviate.
Using hardware that does not match the frame weight is another frequent issue. Always check the weight of your frame and match it to appropriately rated hooks, nails, or anchors. What worked for a lightweight print may fail catastrophically under a heavy framed mirror.
Skipping the level is a mistake that always becomes apparent once the frame is up and you step back. Even a degree or two of tilt is immediately noticeable to the human eye. A few extra seconds with a level is always worth it.
Conclusion: The Satisfaction of a Perfectly Hung Picture
Learning how to hang a picture well is one of those practical skills that pays dividends every time you look at your walls. It is not complicated, but it does reward careful preparation, accurate measurement, and an understanding of what your walls are made of and what they can support. From choosing the right height to selecting the correct hardware to leveling your frame with care, each step in the process contributes to a final result that feels intentional and polished.
The next time you need to hang a picture — whether it is a single cherished photograph or an ambitious gallery wall spanning an entire room — come back to these principles. They work every time, in every home, on every wall type. Your walls deserve the effort, and so does the art you choose to display on them.
Frequently Asked Questions
Q1: What is the correct height to hang a picture on a wall?
The widely accepted standard is to position the center of the picture at 57 to 60 inches from the floor, which corresponds to average eye level. This is the rule used in professional galleries and by most interior designers. When hanging a picture above furniture, leave approximately 6 to 8 inches between the top of the furniture and the bottom of the frame to maintain a visual connection between the two.
Q2: How do I hang a picture without making holes in the wall?
Adhesive picture hanging strips — such as those made by Command — are a popular damage-free option for lightweight to medium-weight frames. They work by bonding to smooth, clean wall surfaces and are removed cleanly without leaving holes or paint damage. However, always check the weight rating on the packaging and never exceed the maximum load. For heavier pieces, nails or screws remain more reliable.
Q3: How do I find a stud in the wall before hanging a picture?
The most reliable method is using a stud finder, an inexpensive battery-powered device that detects density changes behind drywall. Alternatively, knock along the wall with your knuckle — a hollow sound indicates empty drywall, while a dull, solid sound suggests a stud behind it. Studs in most residential homes are spaced 16 inches apart, so once you find one, you can measure along to find the next.
Q4: Can I hang a heavy picture on drywall without a stud?
Yes, but only with the right wall anchors. Toggle bolts and butterfly anchors are specifically designed to grip the inside of drywall and can support significant weight — some are rated for 50 pounds or more. Always match the anchor type and size to the weight of your frame, and check the packaging for the specific load rating. For very heavy pieces, finding and using a stud is always the more secure option.
Q5: How do I hang two pictures side by side at the same height?
Start by deciding the height for the center of both pictures — ideally at eye level. Use a measuring tape to mark that height at both hanging points, then connect the two marks with a level line to confirm they are perfectly horizontal. Measure the hardware offset on each frame individually, since frames of different sizes may have different distances between the top and the hanging point. Drive each nail at the correct position, hang both frames, and use a level across the tops to make final adjustments.
How to Delete Instagram Account